Here’s a picture of my current astrophotography rig. Unfortunately, the little adventure I’ve been having with the Simak 240 has unfolded itself to an early grave, and it’s my intention to have it professionally repaired and then get rid of it.

In the picture above you can see my loyal and sturdy 10Micron GM2000, simply an incredible piece of hardware, now sporting a GSO RC8 given to me by Samuel.

The lad has worked like a plough horse to get things running, and now we’re 99% down the road. There’s a minor, but nonetheless noticeable, tilt issue on the optical train, so I hope the good Sam will manage to fix it on his next trip to Nerpio.

It’s been a long 7 months since I purchased a second-hand Simak 240 that turned out to be afflicted by some pinching. Despite the best efforts by my friend Samuel, who doesn’t live too far from my remote observatory, it could not be fixed.

Several trips, several attempts, and it would just not go away. As I have resolved to send the telescope to the original manufacturer for repairing, Samuel gave me his RC8.

It’s an 8 incher instead of the 10 incher I had originally bought, and a little slow at F/8 (compared to the Simak 240 at F/5.6), but it’s well tested and it was already in Nerpio, so it only needed to be transferred to my mount.

After an incredible string of bad weather, in what has turned out to be the rainiest winter in Spain in recorded history, finally Samuel took a chance and travelled to the observatory location to install his telescope (soon to be mine) on my staunch GM2000.

Here’s my first light, which I’m very happy about. The seeing was terrible last night, and I think the collimation could be improved, but I’m glad the nightmare is pretty much over.

Now I’ll have to ship the Simak to Venice, hometown of Costruzioni Ottiche Zen, have them repair it and certify that it works fine now. Then I’ll try to sell it on the Italian territory.

I hope that my being well known in the astronomy community thanks to my work on AstroBin will shadow the fact that I can’t show any good pictures made with the Simak 240.

Here’s the AstroBin link for this M81: M81 on AstroBin

CEDIC 2013

I had the great pleasure, this past weekend, to attend and be a speaker at the Central European Deepsky Imaging Conference.

It was my first astrophotography conference, and I had a great time giving faces to a lot of names. I’ve met with many people I only knew online, and some folks whose reputation had preceded them.

My talk was about AstroBin and its significance for the amateur astronomy community. I briefly explained what the site is and what it can do. I touched on AstroBin Questions, and AstroBin Raw Data.

It was a great honor to have the stage right after the famous David Malin, whom many consider the father of modern astrophotography, thanks to the many techniques he has pioneered.

The talk went well, even though I wish I had had more time.

I’m looking forward to be at CEDIC again in two years!

If you find yourself having to migrate from MySql to Postgresql, and you use mysql2psql as suggested all over the Internet, mind that all the Postgresql SEQUENCEs will be orphaned.

You may go and fix them one by one like this:

ALTER SEQUENCE foo_id_seq OWNED BY foo.id;

but that might take you forever. The following code will update all of them in one go.

create function exec(text) returns text language plpgsql
 as $f$ begin execute $1; return $1; end; $f$;

select exec(format('alter sequence %s owned by %s.%I',
                   c.oid::regclass, a.attrelid::regclass, a.attname))
  from pg_class c
  join pg_depend d on (d.refobjid=c.oid and d.refclassid='pg_class'::regclass)
  join pg_attrdef ad on (d.objid=ad.oid and d.classid='pg_attrdef'::regclass)
  join pg_attribute a on (a.attrelid=ad.adrelid and a.attnum=ad.adnum)
 where c.relkind='S'
   and not exists(select * from pg_depend
                   where objid=c.oid and classid='pg_class'::regclass
                     and refclassid='pg_class'::regclass and refobjsubid>0
                     and deptype='a');

Remember to use transactions (begin; and commit;, or rollback; in case of error), and to backup your database before attempting this. I’m not responsible for your data losses.

The Tizen SDK comes with an emulator based on QEMU. The default configuration doesn’t allow you to connect from the host machine to the guest OS, other than using sdb.

While developing HTML5 frameworks and apps, I find the need to use the Chrome debugger by attaching it to the remote session running within the emulator, and to do that I need to establish a TCP connection from the host machine to the guest OS.

QEMU comes with a way to forward ports, but to use it, we must activate the QEMU monitor. Edit your ~/tizen-sdk-data/emulator-vms/vms/YOUR_VM_NAME/vm_config.xml file, and add the following tag inside the <usability>tag:

<advancedOptions>-monitor unix:/tmp/qemu.sock,server,nowait</advancedOptions>

The following script will install your HTML5 widget, launch it, and connect a remote Chrome debugging session to it:

#!/bin/sh
LOCAL_PORT=11223
SOCKET='unix:/tmp/qemu.sock'

echo "Building..."
# This script simply create a zip file with the content of the HTML5 app
./make-wgt.sh my_app.wgt >/dev/null

echo "Pushing the widget file..."
# This copies the file over to the emulator
sdb push my_app.wgt /home/developer

echo "Installing the widget file..."
# The following line does, in order:
#  - Remotely kill an instance of the app if it's running
#  - Uninstall it
#  - Install the new version that we previously copied
#  - Launch it
#  - Get the port number where we can attach our remote debugging session
# We are hardcoding the app's id here (123456790).
REMOTE_PORT=`sdb shell 'wrt-launcher -k 1234567890; sleep 2; wrt-installer -un 1234567890; wrt-installer -i /home/developer/my_app.wgt; wrt-launcher -d -s 1234567890' | awk '/port:/ { print $2 }'`

echo "Enabling forwarding to port $PORT..."
# This removes previous port forwarding rules. We are using 'socat' to
# connect to the UNIX socket that QEMU opened thanks to the XML changes in the
# Tizen VM config.
echo "hostfwd_remove ::$LOCAL_PORT" | socat $SOCKET -
# This creates the new forwarding rule.
echo "hostfwd_add ::$LOCAL_PORT-:$REMOTE_PORT" | socat $SOCKET -

echo "Starting debugging..."
# Now we can connect for some remote debugging.
google-chrome http://localhost:$LOCAL_PORT

Hope this helps.

A starless Horsehead

Few weeks ago, another customer of AstroCamp, Roland, was nice enough and had a look at my telescope, disassembling it in order to find where the pinching of the optics laid. Howver, he didn’t manage to solve the problem. Instead, he took some pictures of the disassembled system, and they have helped the manufacturer of the telescope give me good directions as to how to proceed.

After assembling the telescope again, he didn’t unfortunately have time to collimate it, so I’m now left with a disastrously bad collimation! It’s so bad, I had to remove the stars from the above pictures to make it worth looking at.

It’s very promising, but you can see how there’s a definite loss of detail.

Samuel, whom I cannot ever thank enough, will go to Nerpio again in a week or two, and this time I’m confident that the problem will be fixed for good!

I got a Lenovo X230 for work, and I wanted to quickly report on the only issue I’ve had after a mint installation of Ubuntu 12.10. The touchpad was jumpy, meaning that even the slightest touch would make it jerk 20 or 30 pixels, so it was impossible to move exactly where you wanted to, with fine-grained precision.

A quick search got me on a bug reported on Launchpad, and the solution was very simple.

Simply create a file called /etc/X11/xorg.conf.d/50-touchpad.conf (create the xorg.conf.d directory if it doesn’t exist), with the following content:

Section "InputClass"
        Identifier "touchpad"
        MatchProduct "SynPS/2 Synaptics TouchPad"
        Driver "synaptics"
        # fix touchpad resolution
        Option "VertResolution" "100"
        Option "HorizResolution" "65"
        # disable synaptics driver pointer acceleration
        Option "MinSpeed" "1"
        Option "MaxSpeed" "1"
        # tweak the X-server pointer acceleration
        Option "AccelerationProfile" "2"
        Option "AdaptiveDeceleration" "16"
        Option "ConstantDeceleration" "16"
        Option "VelocityScale" "32"
EndSection

You will then most likely have to configure the Acceleration and Sensitivity using Ubuntu’s Settings application.

I’m about to start contributing the jQuery project, and one thing they left out in their documentation, is how to get your testing environment up. You need to be able to serve PHP, because of the AJAX testing.

This post shows you how to configure nginx, PHP5, and FastCGI on a Debian based system. It’s been tested only on Ubuntu 12.10.

First, install the required software:

sudo apt-get install nginx php5-cgi

Then create the file /etc/nginx/sites-available/jquerytest with the following content (but remember to change the root path):

server {
        root /path/to/jquery;
        index index.php index.html index.htm;

        # Make site accessible from http://jquerytest/
        server_name jquerytest;

        location / {
                try_files $uri $uri/ /index.php =404;
                # A little workaround to allow POSTing to static files
                error_page 405 = $uri;
        }

        fastcgi_index   index.php;

        location ~ \.php {
                # Workaround PHP vulnerability:
                # http://forum.nginx.org/read.php?2,88845,page=3
                try_files $uri =404;
                # Alternatively you can set
                # cgi.fix_pathinfo = false
                # in php.ini

                include /etc/nginx/fastcgi_params;
                keepalive_timeout 0;
                fastcgi_param   SCRIPT_FILENAME  $document_root$fastcgi_script_name;
                fastcgi_pass    127.0.0.1:9000;
        }
}

Link this file in sites-enabled:

sudo ln -s /etc/nginx/sites-available/jquerytest /etc/nginx/sites-enabled/

We have configured nginx so it can use FastCGI to serve files, so now we need to run the FastCGI daemon. Create the file /etc/init.d/php-fastcgi with the following content:

#!/bin/bash
BIND=127.0.0.1:9000
USER=www-data
PHP_FCGI_CHILDREN=15
PHP_FCGI_MAX_REQUESTS=1000

PHP_CGI=/usr/bin/php-cgi
PHP_CGI_NAME=`basename $PHP_CGI`
PHP_CGI_ARGS="- USER=$USER PATH=/usr/bin PHP_FCGI_CHILDREN=$PHP_FCGI_CHILDREN PHP_FCGI_MAX_REQUESTS=$PHP_FCGI_MAX_REQUESTS $PHP_CGI -b $BIND"
RETVAL=0

start() {
      echo -n "Starting PHP FastCGI: "
      start-stop-daemon --quiet --start --background --chuid "$USER" --exec /usr/bin/env -- $PHP_CGI_ARGS
      RETVAL=$?
      echo "$PHP_CGI_NAME."
}
stop() {
      echo -n "Stopping PHP FastCGI: "
      killall -q -w -u $USER $PHP_CGI
      RETVAL=$?
      echo "$PHP_CGI_NAME."
}

case "$1" in
    start)
      start
  ;;
    stop)
      stop
  ;;
    restart)
      stop
      start
  ;;
    *)
      echo "Usage: php-fastcgi {start|stop|restart}"
      exit 1
  ;;
esac
exit $RETVAL

Make the file executable and start the daemon:

sudo chmod +x /etc/init.d/php-fastcgi
sudo /etc/init.d/php-fastcgi start

Edit your /etc/hosts so that you’ll be able to access your jQuery test page, served by nginx:

127.0.0.1 localhost jquerytest

Finally, restart nginx:

sudo service nginx restart

You are now ready to run the unit tests by visiting: http://jquerytest/test/

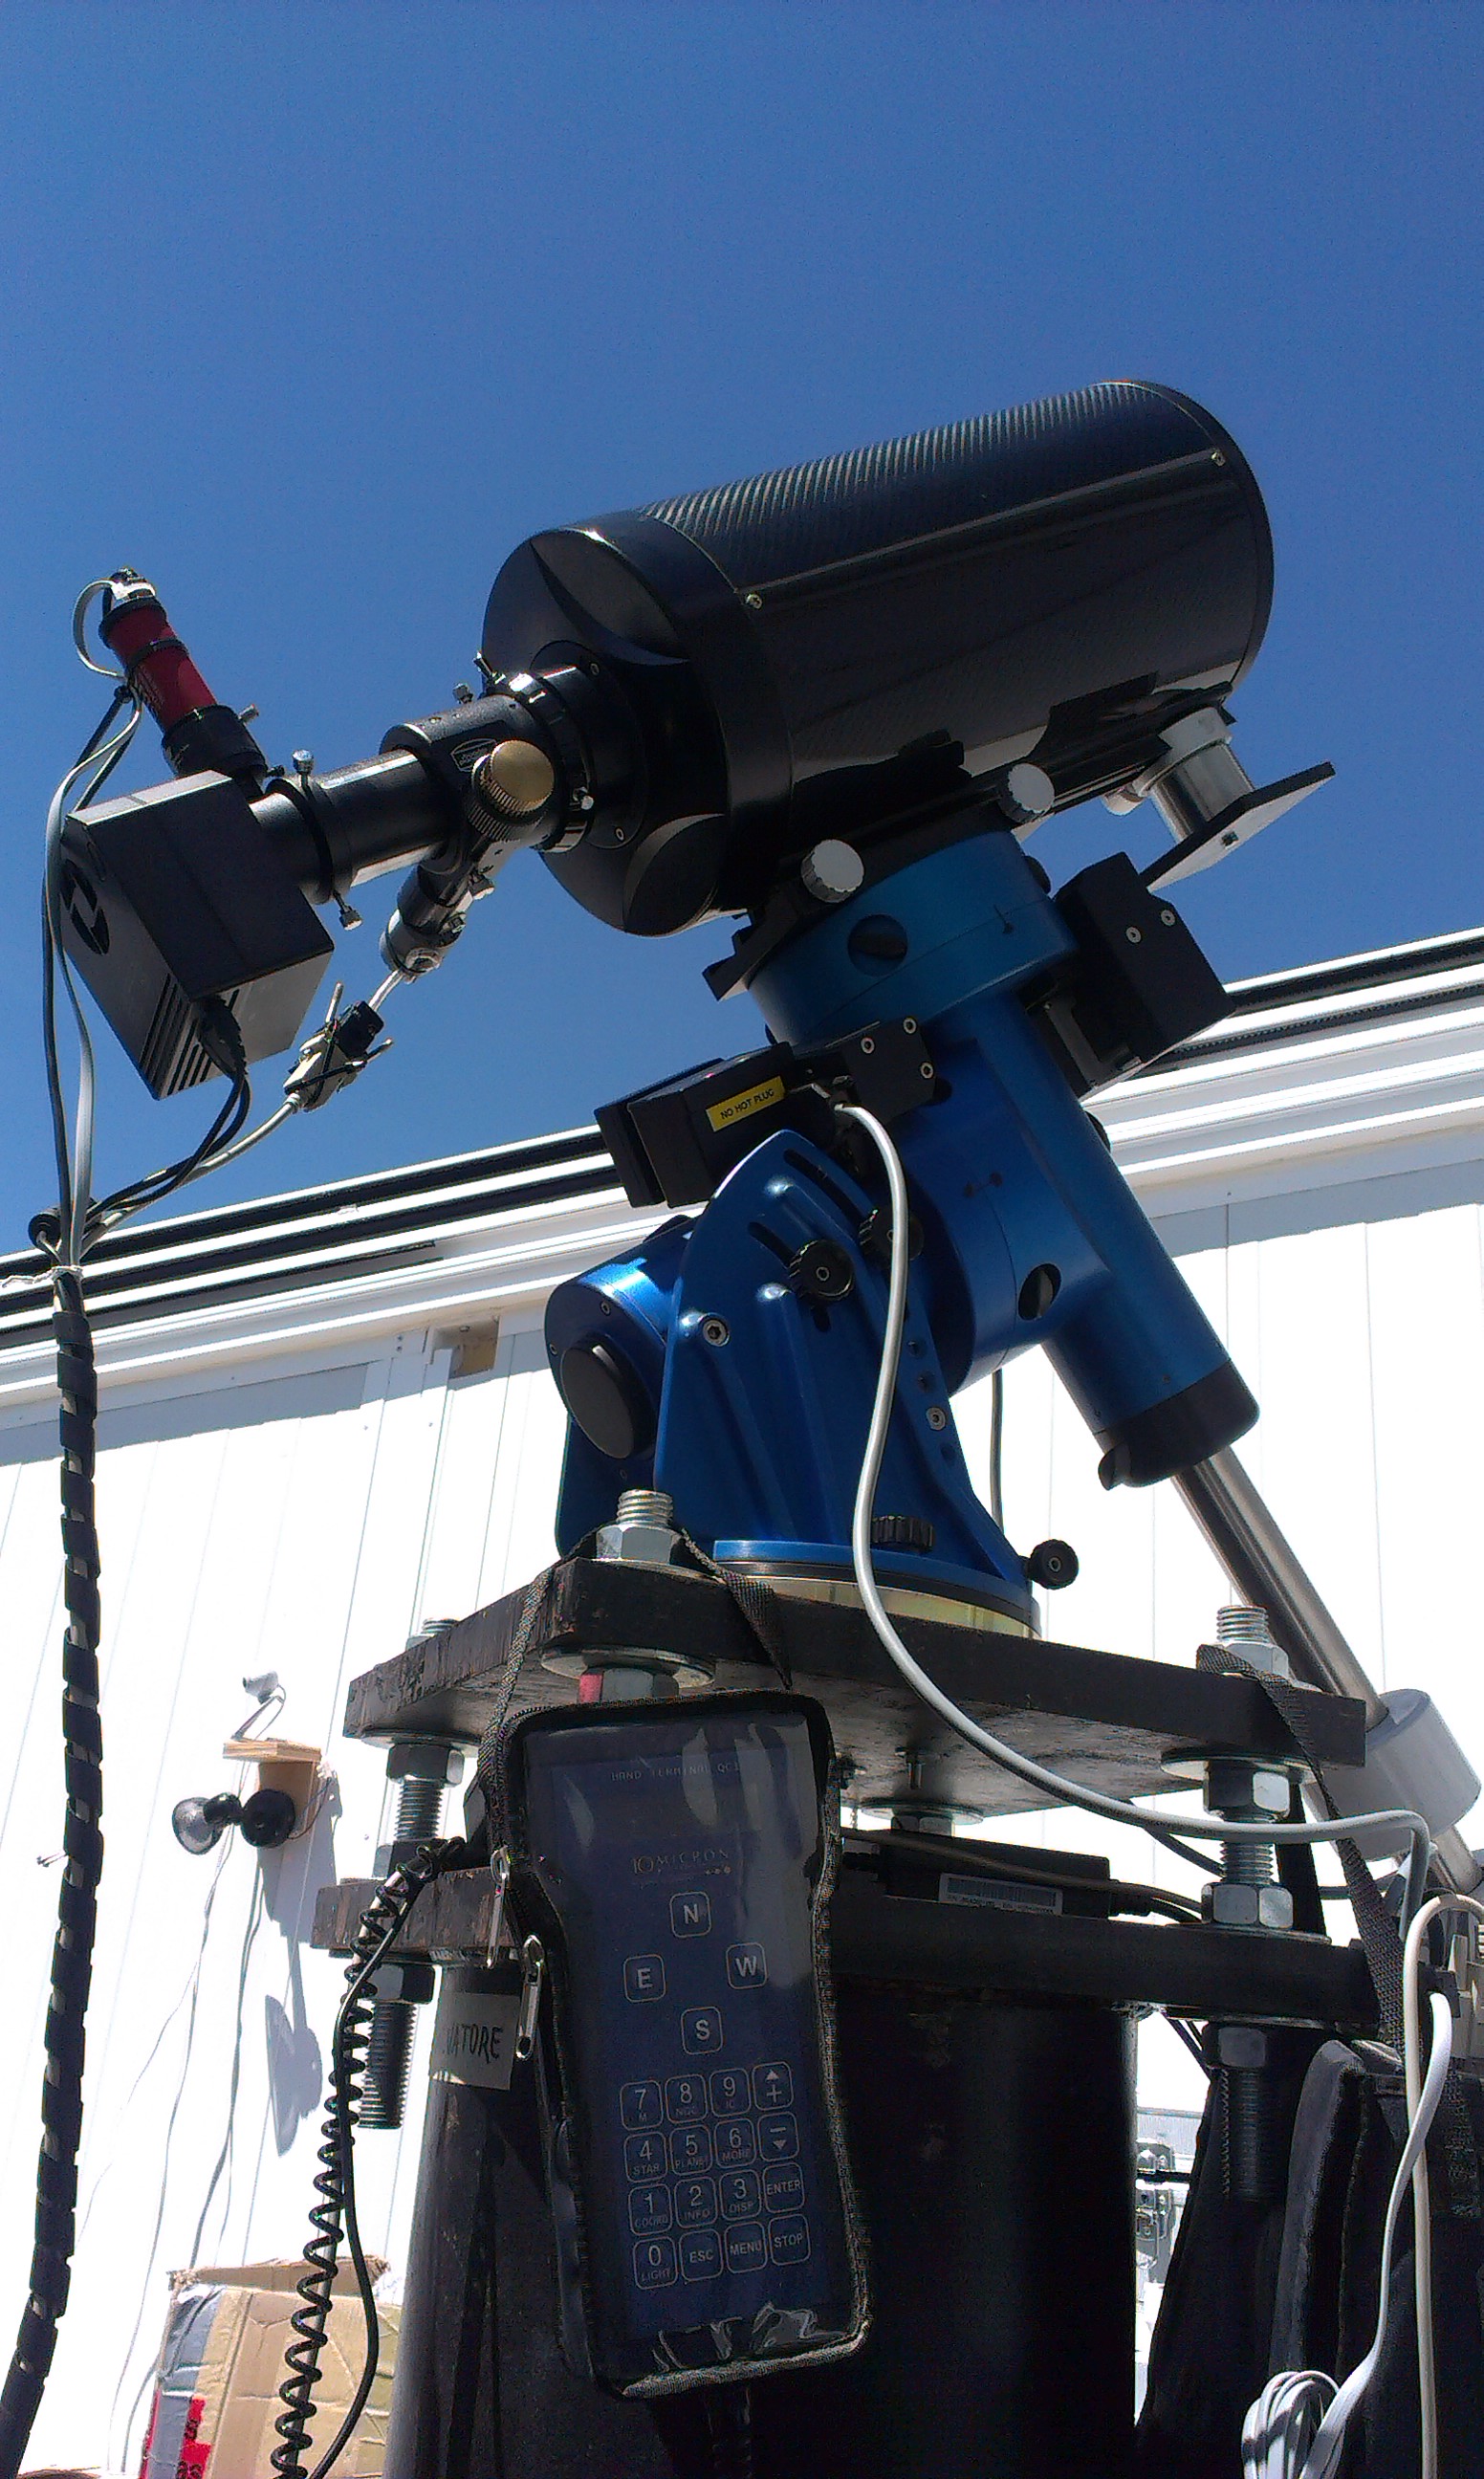
And up and down the roller coaster, with my recently acquired Simak 240, and off we go with another test run. I knew that the collimation was really bad, but I just wanted to test the focuser.

I had had some trouble with the JMI PCFC driver in combination with a certain USB port on my computer. Somehow, after a while, the focuser would simply stop responding. Since all I needed to restore the connection was a reboot, I assumed that there was a software bug that would interrupt the USB connection.

So I asked Samuel to move the focuser to a different USB port, and last night it worked fine. Let’s hope it will keep working in the future: the last thing I need is more trouble with this setup!

Unfortunately, Samuel was unable to fix the collimation of the telescope, on his last trip to Nerpio. This is not because of his lacking of skills, but simply because the both of us didn’t realize that the pinching of the optics was not related to the collimation screws at all.

After an email exchange with the manufacturer of the telescope, Romano Zen, whom I thank for the time he took to help me out, it was clear that what we actually need to do is to disassemble the mirror to access the grid that holds it in place, and loosen it.

I seem to be in good luck (oh, the irony!), because another customer of AstroCamp’s, Roland, offered to help me on his trip to Nerpio, today. He has a Takahashi collimating telescope, and that will be crucial, since the weather is predicted to be really bad in the next few days, and he won’t be able to perform a star test.

I seem to have received a lot of gratuitous generosity, recently, and I’m really grateful to Samuel and Roland for it!

Roland has promised to work on the mirrors, loosen them, and then collimate using the Takahashi telescope. It will be like a blind man painting, given the absence of real stars for testing, so I hope I’ll be in for a nice surprise when the weather clears!

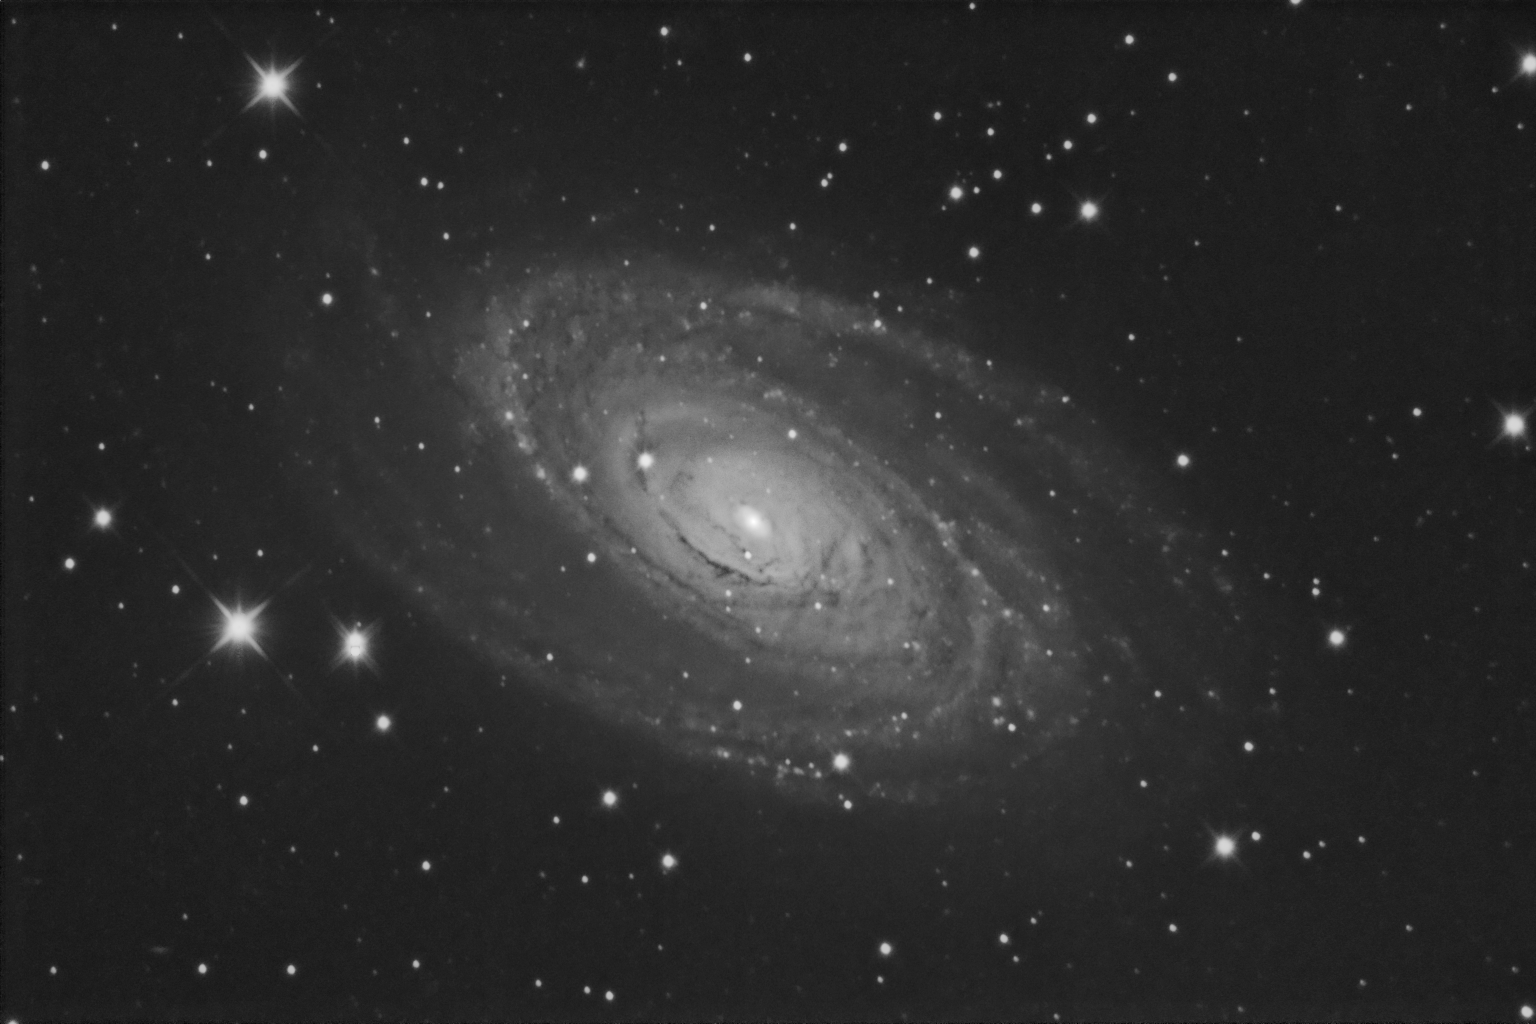
Finally, let me spend some words on NGC 2403.

It’s a an intermediate spiral galaxy in the constellation Camelopardalis. NGC 2403 is an outlying member of the M81 Group, and is approximately 8 million light-years distant. It bears a striking similarity to M33, being about 50,000 light years in diameter and containing numerous star-forming H II regions. (source: Wikipedia)

The Wikipedia page mentions numerous star-forming H II regions, and the following Hubble image processed by Robert Gendler really shows them well:

When my telescope is collimated, I will acquire some H-Alpha data and then borrow color information from somebody.

This telescope is proving really troublesome, and I really hope it will ultimately be worth it. Samuel has been trying to collimate the secondary mirror for several hours, on two nights. Not only would the pinching not really go away, but getting a good collimation was a frustrating and ultimately futile effort.

I’ve been told that it’s extremely unlikely that the primary mirror was pinched and/or uncollimated, but there’s no way that fiddling with the secondary mirror for over 6 hours would yield no acceptable result.

In the following image you can see the extent of the decollimation. It’s pretty serious.

Stacking 46 frames helped, because with many images having been acquired after a meridian flip, some defects averaged out, so the stars are less misshapen albeit more bloated.

Now I have no choice than to ask to AstroCamp folks to start fiddling with the primary mirror, and hope for the best.

« Page 4 / 14 »